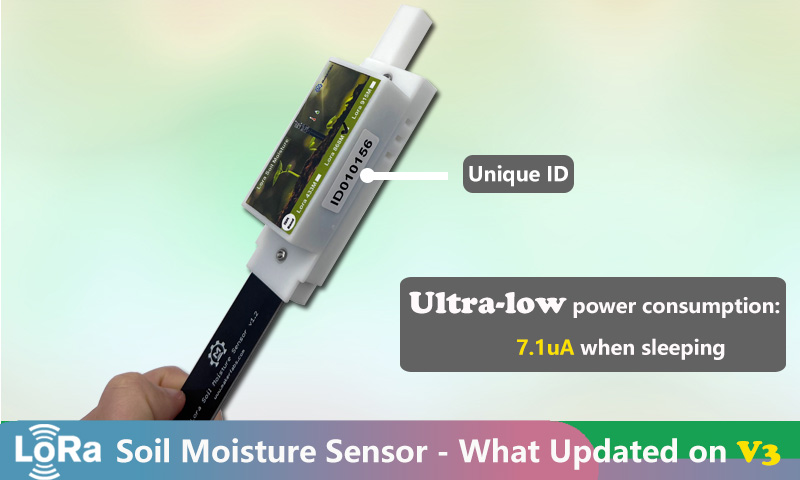
Great improvements on Makerfabs Lora Soil Moisture Sensor V3!!!
1. TLC555 removed, while the Atmega328P(D9/Timer1) generates the 2 MHz pulse (only during measurement phase, switching off afterward), for capacitive moisture measurement.
2. Unique ID by default, for easy/fast usage as getting it on hand.
3. Ultra-low-power consumption design on hardware& firmware, 7.1uA in sleeping mode, minimum 2 years working time with battery 2x AAA.
4. Improved J3166 water-proof paint to enhance the lifetime of usage. It has outstanding moisture-proof, salt fog proof, and insulation properties.
1. Lora Soil Moisture introduction
Makerfabs Lora Soil Moisture is cheap& easy solution for smart agriculture. It is used for monitoring the relative moisture of the soil, the temperature, and the relative humidity of the air. It reports the data via Lora, to remote Lora receiver, and thus to create low-cost remote monitoring network easily. Itis based on Atmel's Atmega328P, it collects local air temperature/ humidity with sensor AHT10, and detect the soil humidity with capacitor-humility measurement, and transmit the local environment data to the gateway, with Lora communication, suit for applications for smart-farm, irrigation, agriculture, etc.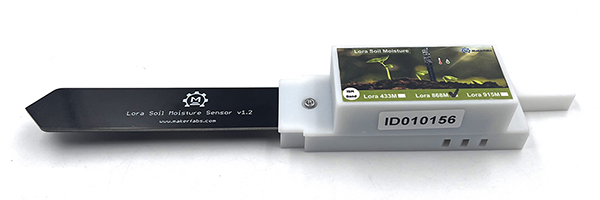
This Lora soil moisture sensor V3 is the upgrade version of V1 and V2 version. Compared to previous versions, the V3 has the following great updates:
1. Much lower power consumption. With Makerfabs detailed design on hardware& firmware, the Lora moisture sensor can work at least 2 years, with 2xAAA batteries;
2. Unique ID for each device. Each Lora moisture sensor is programmed with a unique ID by default firmware, customers can get them on the surface. so the remote Lora receiver can identify them when multiple sensors are used;
3. Improved board coating. J3166 water-proof paint protects the board better, not only makes the board water-proof but also solves the very problems of electrode corrosion, soil electrolysis and resulting in better accuracy and longer battery life.
Check this video to know the PCBA coating process for the Lora soil moisture sensor:Lora Soil Moisture be installed by plugging into the soil, either in a flowerpot or place near a plant, it monitors the air/soil status and reports the data to remote Lora receiver, with its unique ID, so the remote receiver can monitor/ identify the signal, and make alarms/actions, to help the plants.
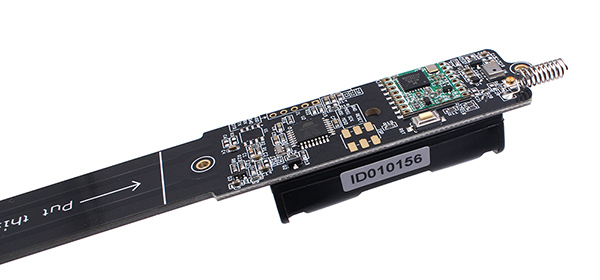
Lora Temperature/ Humidity/ Soil Moisture Sensor is shipped out with Arduino pro-mini bootloader pre-loaded, and there's also Makerfabs default sketch programmed. Of course, Uses can re-program it with Arduino IDE, we suggest a standard USB2UART converter for this. Note that the DTR in the USB2UART converter is needed to connect to the "Reset" pin for Arduino sketch downloading, if there is no DTR, you may need to press the “reset” button manually in the downloading.
Features
1. Wireless Lora Transceiver
2. Soi Moisture Measurement based on capacitive Testing
3. Unique ID
4. Low power: 7.1uA when sleeping. 2 years working life with 2xAAA battery
5. Onboard AHT10 sensor to monitor air temperature and air humidity
6. Onboard Battery Voltage Measurement
7. Full Open Source- all hardware and software open at GitHub
8. Compatible with Arduino
9. Supply power voltage: 2.0V~3.3V
10. 3D printing case
2. Lora
Lora Soil Moisture integrated the Lora Module, there are three frequencies, please select the proper one: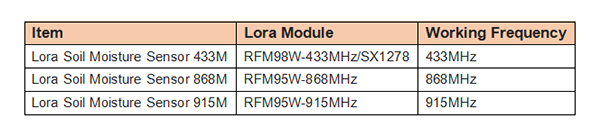

3. Working Principle
Makerfabs Lora Soil Moisture is based on capacitive sensing to measure the moisture - damp soil acts as an electrolyte increasing the capacitance of some makeshift capacitors made of a couple of traces on PCB.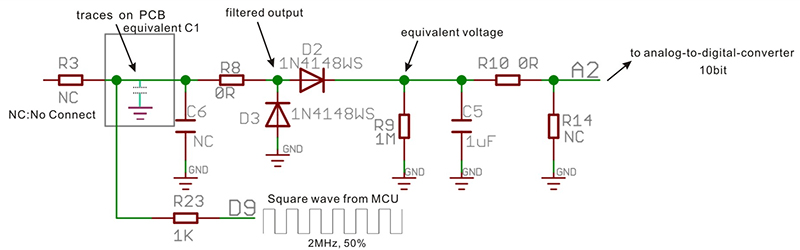
As the schematic shows, 2MHz square wave (output by internal timer1, D9 of 328P) is output from the chip through a resistor into a big pad(that is PCB traces), that together with the surrounding soil, forms a parasitic capacitor C1. Resistor R23 and the capacitor C1 form a low pass filter whose cutoff frequency changes with changing capacitance. As the soil moisture changes, the capacitance of C1 changes, so we can get the soil moisture status by checking the final voltage on the R9.
The formula of capacitance is as below:

The soil around the sensor acts as an electrolyte whose dielectric constant(ε) changes depending on the amount of moisture in it, so the capacitance of our makeshift capacitor changes too. The filtered square wave is fed into a peak detector formed of out a diode(D2) and a capacitor(C5) - the diode D2 lets through positive peaks and the capacitor stores the maximum voltage of those peaks. This voltage is measured by an ADC in the microcontroller.
3.1 Select a proper Frequency
To select a proper pulse frequency, we had generated four different frequencies of the square wave to make a comparison, we can see from the figure as below: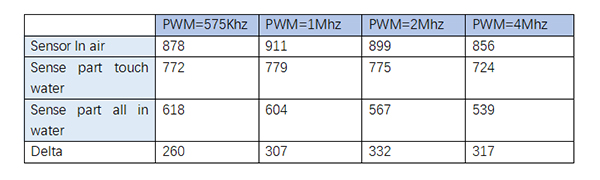
3.2 Low Power Strategy
Lora Soil Moisture closes the PWM outputs and ADC(It’s important, ADC affects some of the power consumption) when sleeping, microcontroller goes into sleeping mode after Lora’s sleep. Wake up by the internal time, get the value of the air temperature and relative humidity from AHT10. Open the PWM outputs and ADC to measure the soil moisture and battery voltage. Then send them out via Lora. Repeat the work progress all the time.The most energy is consumed when measuring the moisture level and transmit to Lora receiver. Much of the time is in Low power mode. The default sleep time depends on the Macro SLEEP_CYCLE. When SLEEP_CYCLE is defined as 450, sleep time is (450+1)*8s=3608s, almost 60 minutes. Then send the data out about 2 seconds.

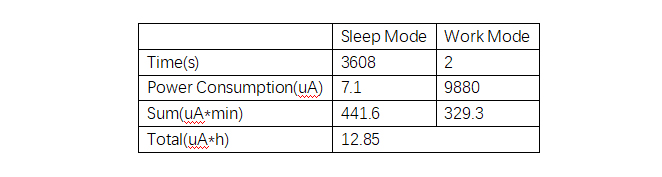
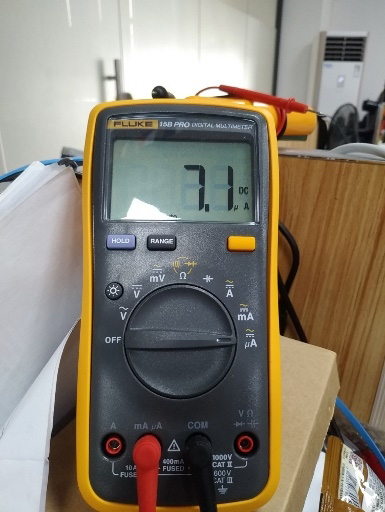
We tested the average power consumption when working is 9.88mA and the low power consumption when sleeping is 7.1uA. If use 1000mAh 2*AAA batteries, it can be worked for more than 77821 hours(more than 3 years) in theory. However, what is need to be noticed is that the final lifetime depends on the life of the battery and PCB.
Also, you can change sleep time (the SLEEP_CYCLE value in the code) as your requirement.
3.3 Typical Output
We can distinguish some of the states according to the analog value. With 10 pcs soil moisture sensor, we get the typical output, for your alarm reference.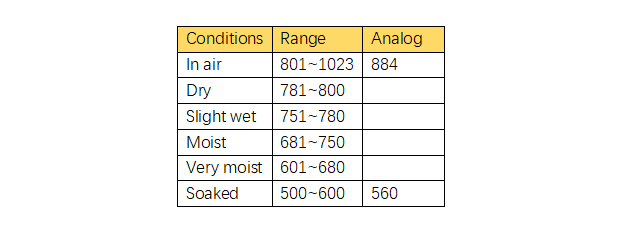
Note: The analog data get when powered by 3.0V
4. Open Source
Makerfabs Lora Soil Moisture is Open Source, all the schematics and code are available on Github pages.5. Usage
Makerfabs Lora moisture sensor V3 is ready to use as getting to customers hands:1. Install 2xAAA batteries(1.5V*2)
2. Plug it into the soil, anywhere you would like.
Then it will begin to work, with broadcasting its unique ID and testing data via Lora, in a few seconds, and fall into sleep with 60 minutes, and then broadcast again(in 2s), repeated again and again.
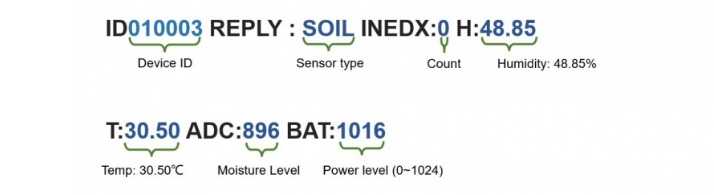
The Makerfabs outputs the info in the following format:
ID010003 REPLY : SOIL INEDX:0 H:48.85 T:30.50 ADC:896 BAT:1016
Which includes all the necessary info: Unique ID/ Sensor type/ Package Count/ Air Humidity/ Air Temperature/ Moisture Level/ Power supply monitoring
With the unique ID, users can create a remote Lora receiver to receive this info and identify which one is necessary to take action, such as alarming/ watering.
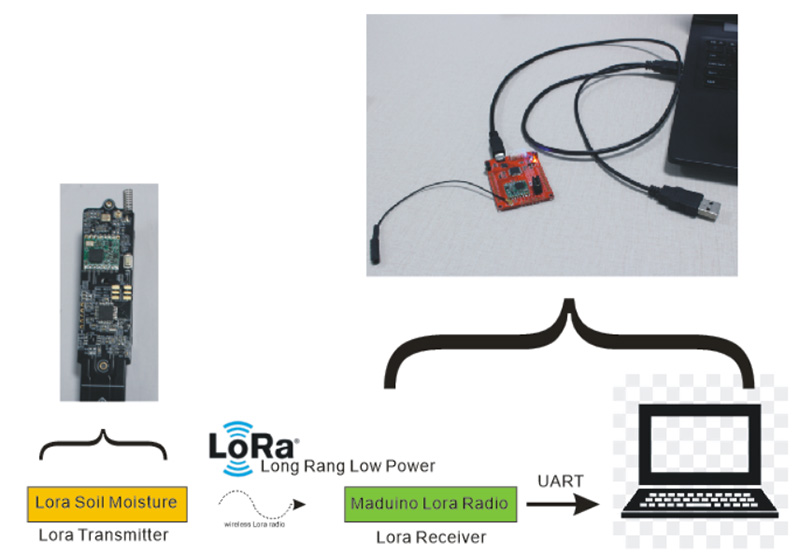
Makerfabs provide 3 Lora receiver solutions:
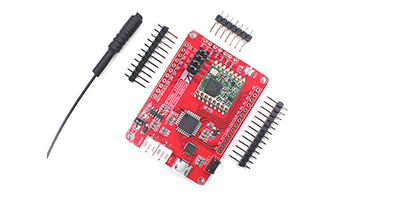
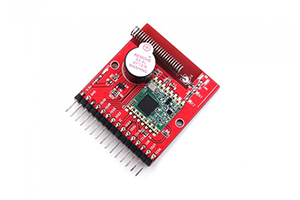
1. With Maduino Lora module(with Arduino IDE)
2. With ESP32 Lora Gateway:
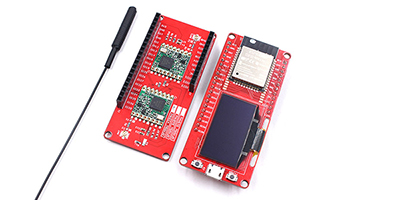
3. With ESP32 3.5 inch display and Lora Expansion
For more detailed step-by-step usage, please refer to Makerfabs Wiki page.
Inspired by chirp! - the plant watering alarm project, big thanks to Albertas.
Reference resources:
1. Chirp! - the plant watering alarm
2. Capacitance measurement using low pass filter
3. Testing Capacitive soil moisture sensors
Comments
Post a Comment